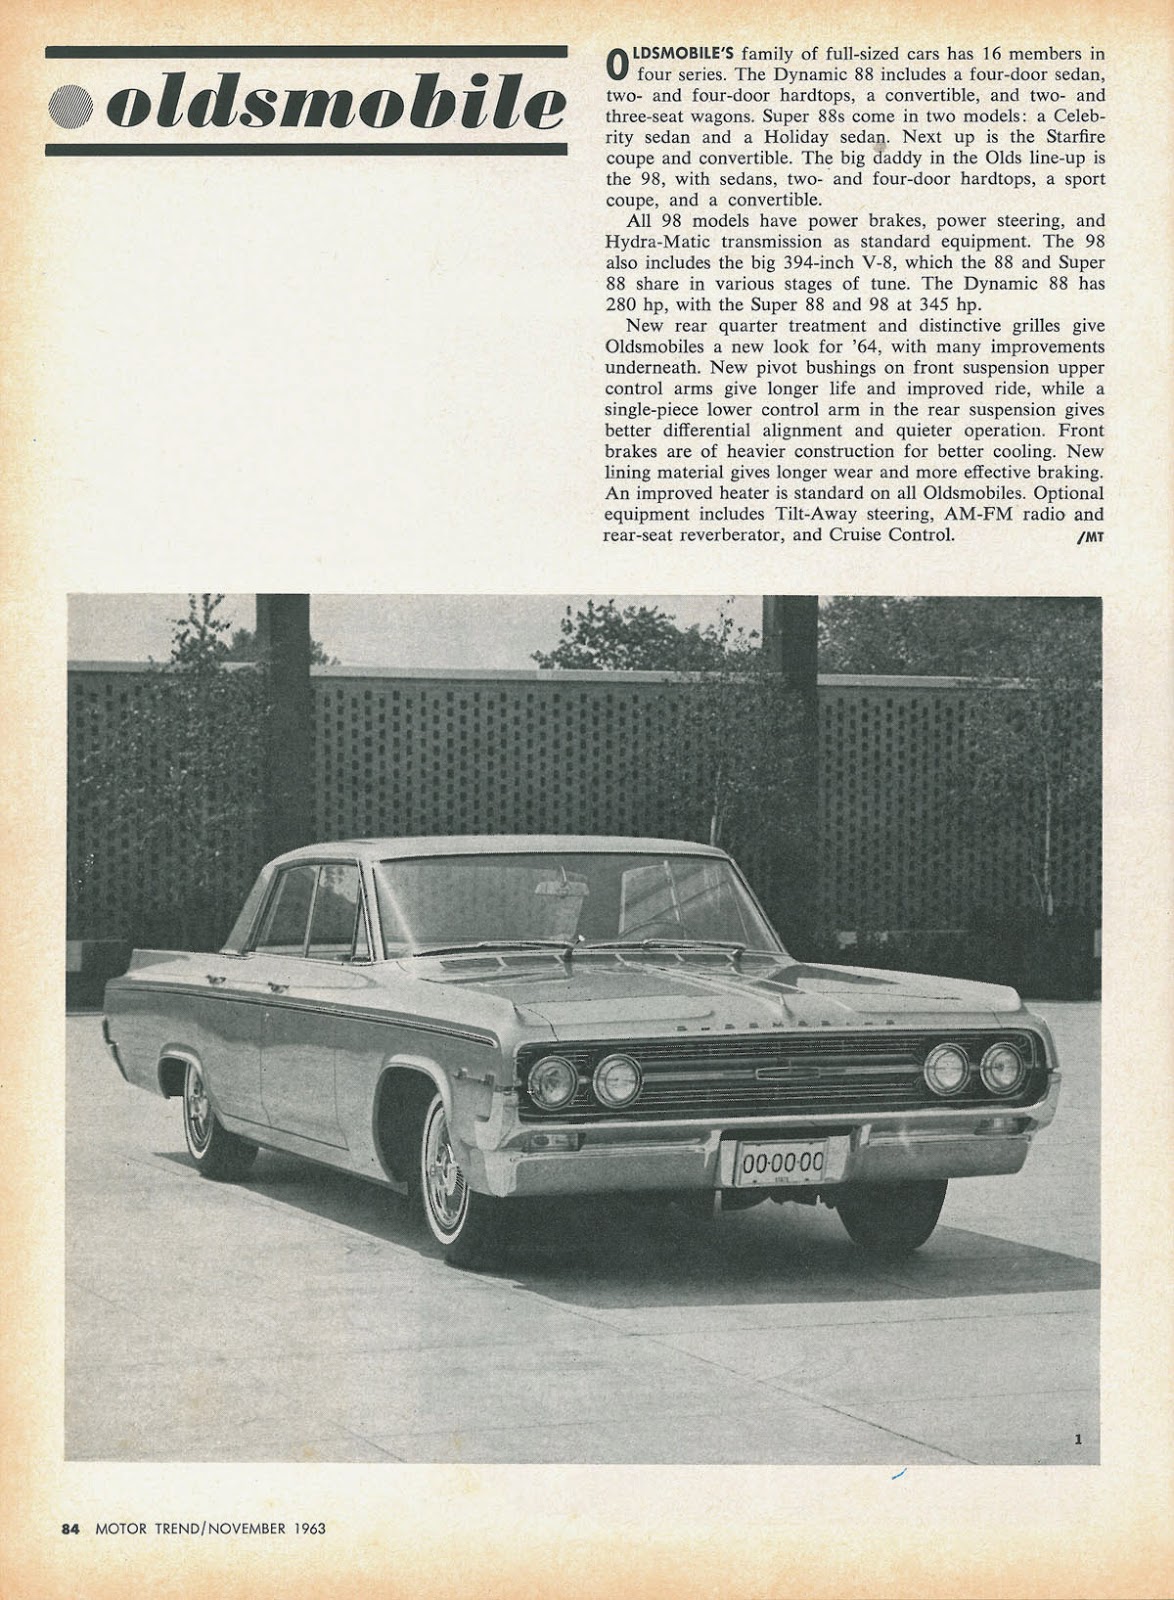
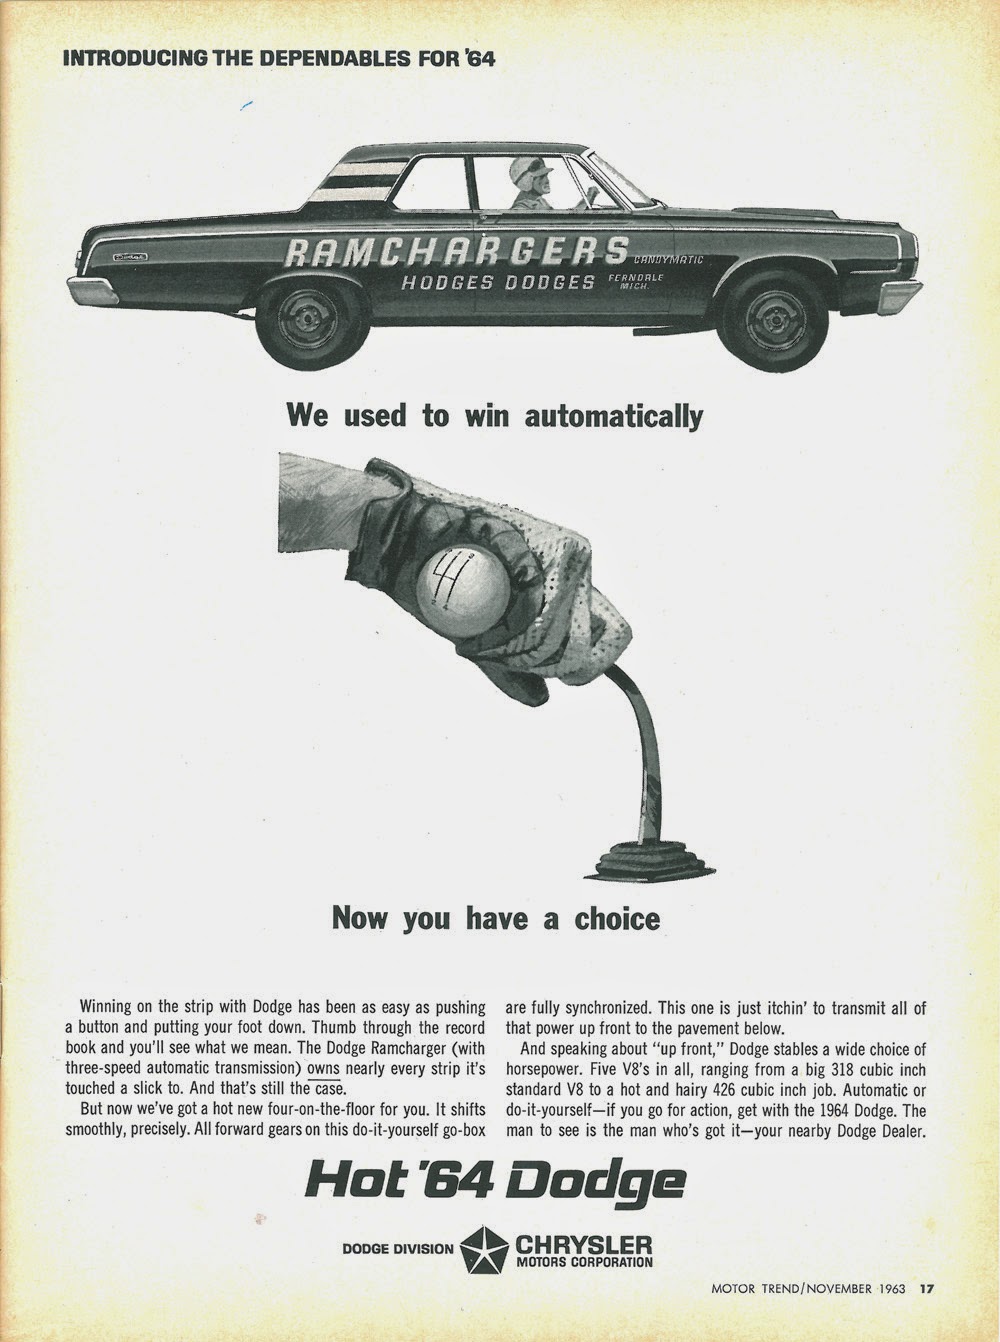
In my previous post, I showed many of the cool ads from the November 1963 issue of Motor Trend Magazine. In this same issue is the 1964 model lineup for all of the domestic car manufacturers. If you don't recognize some of them, I wouldn't admit that fact to another car guy or gal! They are listed in alphabetical order, starting with American Motors and ending with Oldsmobile. More to follow in a future post.
Monday, May 12, 2014
Friday, May 9, 2014
1964: When Madmen Ruled the Car Magazines
If you are a baby boomer such as I, the 1960's hold magical memories of growing up and in my particular case cars! At one of the many Estate Sales I have chanced to visit I found a November 1963 issue of Motor Trend Magazine which featured all of the new cars for the 1964 model year.
![]() |
| FRONT COVER |
![]() |
| BACK COVER |
Notice that it only lists American Car makers, including many that no longer exist! I find that the fascination for these old publications is in the Advertisements. The common theme is of course....PERFORMANCE!
Subaru Flat Four Valve Cover Gaskets
As much as I enjoy working on cars, sometimes it's still a royal pain in the ASS! Since my last installment, my 3rd car, SUEBEDO, sprung a serious oil leak. Sitting overnight, it would leave a nice dinner plate size puddle of oil. Of course, looking under the car nothing was obvious, except oil all over the undercarriage. I paid my fellow shade tree mechanic a visit, where we cleaned the underside and then pulled it on his lift. Oil was dripping gleefully from the passenger side valve cover. To those uninformed about the mechanics of a Subaru, they have a flat four or pancake engine.
It has a pair of valve covers and when the engine comes to a rest, the oil pools inside them. I tried to tighten the bolts, but this did little to stem the flow. I ordered a set of valve cover gaskets from Rockauto (here's some more of my money.....). Once they arrived, I arranged to go back to the garage so that I could replace the valve cover on the passenger side. Having a lift to do this job is a definite plus and was well worth the 6 pack of select brews brought along to pay for the lift rental. Two hours later passenger side valve cover was done. I'm not going to go into the gory details about the effort to replace one valve cover, but needless to say this was the easy side (more about this later). I drove home and parked the car for the evening. When I came out in the morning, the flow of oil had stopped on that side, but there was still oil pooling under the car, although in a slightly different position. I resigned myself to the fact that the driver side was going to have to be replaced also. This past Sunday, I opted for doing it in my driveway. I pulled the car onto my ramps, as I knew I would have to get to the bottom bolts to get this side loose. In practice this sounds easy, but in reality NOT! Subaru in their infinite wisdom has the lower bolt at the firewall end lined up with the strut tower. This allows for about 2" of working room. To those initiated in working on cars, this sucks! Thankfully, thanks to my days working in the Car Repair field years ago, I had the right tools to do the job. I warn you, if you only have the basic tools to work on cars, you would likely not been prepared to get this last bolt out. It took as long as the other five even with the right tool. Another two hours later, and this valve cover gasket was done. As much as I would have loved to provide photos with this tale, it didn't happen as I wasn't even thinking about make a blog post about this. Today is day 5 after I finished this work. Woohoo! No fresh oil is under the car. It would seem that this repair has eliminated the leaks. What did I learn? 1) Valve cover gaskets are a pain in the ASS on Subarus, 2) Valve cover gaskets take at least 4 times longer than a conventional 4 cylinder like in my Honda Civic SI (this one is next), 3) I did save myself a small chuck of change doing it myself, as labor on this job would have likely cost an arm and a leg if I had to pay someone.
Tuesday, December 3, 2013
Rockin' & a Rollin' in the wrong place or another story from the "Shade Tree Mechanic"
Why is it that for one step forward, we always feel like we are actually taking two steps backwards? Last month, the VA State Inspection was due on my car. I had been told on the past two inspections that my brakes were very close to the minimum thickness. Being that I only drive approximately 6,000 miles a year on this car, I figured they would eventually start making noise when it was really time. Also, as I was going to replace the pads and rotors, if it went metal to metal, it wouldn't matter. This year, I thought my number was up on the brakes and ordered the parts on-line. Usually, they show up in a timely manner, but this time, they have yet to arrive. Since I needed to get my car inspected before the end of November, I figured that I would chance that the brakes would pass one more time and dropped the car off for the inspection. I thought that maybe the car might pass, but if it didn't, it would be better to have a rejection sticker, which gives me 15 days to effect any repairs, then to drive around with a dead inspection sticker, risking a ticket and fine. About mid day, I got a call from the repair shop letting me know that my car had in fact failed the inspection, but not for what I thought! The brakes once again were close (obviously a subjective opinion), but passed the state minimum. What caused my car to fail were Motor Mounts and a broken tail light! Three mounts in fact! I was not surprised to hear this, as the car had been driving a little strangely and this seemed to explain why. Of course, the shop wanted to replace them for me, but I had other ideas. The shop is conveniently located across the parking lot from my office, but they are a Mercedes repair shop and charge commensurate rates for their labor. I paid a visit to my friends at www.Rockauto.com and purchased the three offending mounts for around $50. I then arranged to borrow the lift at one of my fellow Shade Tree Mechanics' home.
Here is the 1st mount that we replaced:
The center section is barely hanging on by one of the four attachment points.
Here is what a new one looks like:
The next one was not much better:
As you can see, it is only hanging on by one attachment point also.
Here's a new one:
Here is the 1st mount that we replaced:
The center section is barely hanging on by one of the four attachment points.
Here is what a new one looks like:
The next one was not much better:
As you can see, it is only hanging on by one attachment point also.
Here's a new one:
The 3rd mount actually could have lasted a little longer as none of the attachment points had broken yet, but were obviously cracking. Additionally, stress from being overworked due to the other mounts being broken explained the recommendation to replace it.
As far as the tail light is concerned, that should arrive tomorrow. The broken one had a dime size hole in it. The last two inspections, I had taped over the hole with clear tape. According to the shop, Virginia no longer allows this cheap repair. In my opinion, they would have ignored it if I had remembered to freshen the tape.
Still have the brakes to do, but that will have to wait for another time.....
Wednesday, November 6, 2013
Suebedo Resurrection
As I understand it, the shade tree mechanic is a dying breed. Growing up, I helped my dad work on cars, doing everything from oil changes to exhaust systems. My dad imparted a love of all things mechanical on me. And to this day, I do all the repairs on my cars that I can. The ability to work on cars has saved me countless thousands of dollars. Thanks Dad!

The point of this post is our 3rd car, a 1998 Subaru Legacy Outback, driven by my teenage son. We bought it used with around 100,00 miles on it, and so far it has been relatively reliable. As expected, I've had to do some repairs such as brakes and both transaxles. It needed a CV boot and I found that I could replace both axles for under $100! Didn't make sense to me to just replace a CV boot. It's also needed a gas filler neck (a common Legacy problem), and knock sensor (another common Legacy problem), and tires. The last thing I've done were the fan (drive) belts. Originally, I had planned on replacing the belts along with the Timing Belt in the spring. Unfortunately, the drive belts failed and I had to replace them. Not a week after doing this, I got a call from my son that the car had quit on him while he sat at a stop light. A good Samaritan help pushed the car to the side of the road where I found him. I looked under the hood and found that the drive belts had come off and jammed the drive pulleys causing the car to quit. I figured it was due to something I did or didn't do when I replaced the belts. I don't usually have problems like this when I work on cars, so was a little perturbed that I was having issues. We got the car towed home and with a little more looking realized that the problem was a little bigger than I anticipated. When looking at the belt pulleys, it was apparent that they were no longer lining up. Especially the main drive pulley on the crankshaft. I started to pull apart the front of the engine and found this:

What you are seeing is the Crankshaft pulley or as some people call it, the Harmonic Balancer. It's not supposed to be in 2 pieces! It's supposed to look like this:
After a little research, I found that Subaru suggests replacement of the balancer when replacement of the Timing Belt is performed. It is a two piece bonded unit that will fail after time. The belt had been replaced, but obviously this had not. I think the stress of the new belts put this part over the edge and caused it to fail along with causing additional damage such as:
What you are seeing it the center timing belt cover where the pulley grooved out a nice little bit of plastic. A undamaged one looks like this:
Now here is where the story takes an interesting turn. Once the pulley has been removed, the engine should be able to start up and run on it's own. When I tried to start it, it would crank, but just would not fire. After consulting with one of my fellow shade tree mechanics, we suspected that the timing belt might have jumped some teeth. With this suspicion, the possibility of a high dollar repair just increased. One thing I learned about this flat four engine is that it is an interference engine. When it has Timing Belt failure, the valves will make contact with the pistons usually bending them beyond usage. If this happens, you might as well start shopping for a replacement engine. These engines are shoe horned into the engine bay and the cost to remove and repair the heads can exceed a low mileage used engine. With this in mind, I proceeded to pull the timing covers off and with the help of my Subaru Guru, we found the the timing belt had jumped 3 teeth! We check the compression (one way to check for bent valves) and reset the timing. Woo hoo! The engine started and seemed to run fine. Being this deep into the engine and no apparent further damage, I ordered a Timing Belt Kit with all of the idler pulleys, a new belt tensioner, and water pump. We think the tensioner was going bad and allowed the belt to jump the teeth. Here is what the front of the engine looks like without the timing covers on:
Along with the kit, I replaced a bunch of the coolant hoses that looked original to the car. Once together, Suebedo fired right up like she had never missed a beat!
What did I learn from this experience?
- Never rely on someone else doing all of the recommended maintenance and proper repairs on a used car.
- Never buy a car that has lived it's early life in the Northeast as this one did. Every time I tried to take something apart on this car a bolt broke or something didn't want to come apart without some extra persuasion.
- This car is like a Chevy or a Ford. They made millions of these cars and the parts are plentiful and easy to find at a good price. Rockauto.com is the king for the best parts prices. I was surprised at how much cheaper they are than any other parts seller on the internet. For factory only parts weluvsubaruparts.com was the place to go.
- In the end, I spent around $500 to get Suebedo back on the road. If I had to pay someone to do this job, it would have cost me around $2000.
Thank you Dad again for the love of mechanics and the ability to turn a wrench the right way. I love you.....
Subscribe to:
Posts (Atom)